

When you book a photography session, no matter the occasion, sharing the images you received is one of the best parts. Wether you’re sharing photos to your social media accounts, sending a sneak peek to a friend, or sending the gallery in its entirety to a family member, It’s easy as pie! But there is so much more to receiving your gallery… So, let’s talk about it!
Wait! Before we start! Out of all four icons you will see when opening your gallery, you will only be using two. The store-front icon, and the shopping cart icon will be of no use, as my store is not set up. The store is used for printing, but I recommend a different route for that.

First things first: Hearting your favorites.

When you receive your gallery you’ll notice that there are four icons. The heart icon is where you will find all of your favorited images, these are the most important photos. These photos are the ones you will want to print out! (We’ll talk more about printing later.)
You can ‘heart’ your favorites by clicking on the image you would like to favorite, and clicking or tapping the heart icon in the top right corner of the screen, then entering your email address.
Whoo-hoo! Now you have saved your absolute favorite photos!
Now it’s time to download and share.
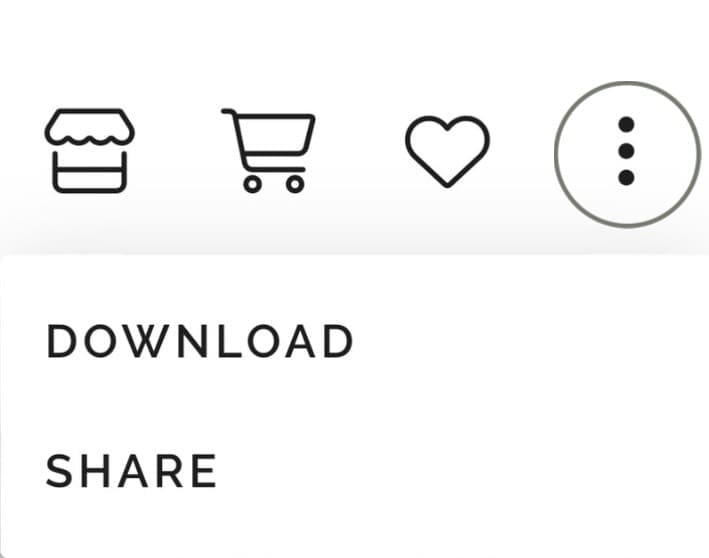
When you click or tap on the three dots on the far right you are presented with the option to either share your gallery, or download it. (Or both!) If you decide to share your entire gallery, wether by email or text, be sure to attach the download PIN if you would like for the recipient to have the ability to download the images.
For downloading your gallery you will be brought to a screen that will ask for your email, and the download PIN, which will be provided upon gallery delivery. Be sure to use an email you have access to, so you can retrieve your images.
Yay! You’ve saved your favorites, downloaded your images, and shared them with your loved ones! So, what’s next?
Printing!
The best way to to preserve your precious memories (at least in my opinion) is to frame them! Hang them up on yours walls for friends and family to see, or put them on a nightstand in your bedroom. So, what is the best route to take for printing? It’s actually pretty simple!
I highly recommend using the photo lab, Mpix. But first, let’s talk about the downloading process, again. So, you already know *how* to ‘heart’ and download the images you want to print, but which device should you download the photos on? The short answer: A laptop or desktop computer. You may be asking why. A mobile device, such as your your phone, is easier, quicker, and just overall much more convenient. But, the truth is.. Mobile devices like phones and tablets will compress the image file, meaning your print will be pixilated, and overall printed in much lower quality.
Okay, so now you have downloaded your desired images to your computer, and have signed into Mpix, what now? Upload your images into a folder, and give it a title, such as “Maternity Photos.” Select all the images and click on ‘Order Prints.’ Now select the quantity of each photos, which is typically 1 per image. Next, and this is super important, when selecting the paper the image is printed onto, choose ‘E-surface.’ (Bonus Alert! You also have the option to pick a frame and matboard!) Finally, it’s time to checkout! When you click ‘next’ and head to your cart you will be presented with different finishing options, I personally select (and *highly* suggest you do the same) the ‘Deep Matte Photographic.’ This is a ‘Classic Matte Finish’ and will prevent any unwanted glares on your final framed product.
And that’s it! You are officially a master in all things galleries! It’s time to share, download, and print your stunning photos!


Be the first to comment